Custom Fields Schema
Overview
The ATS Anywhere API allows you to both create and update custom field schemas for the jobs listed on your site as well as return a list of all the fields you have created.
First let’s take a look at where you can find the additional custom fields you create, found under the default fields of a job listing (https://yourcompanyname.com//admin/jobs/edit/###):
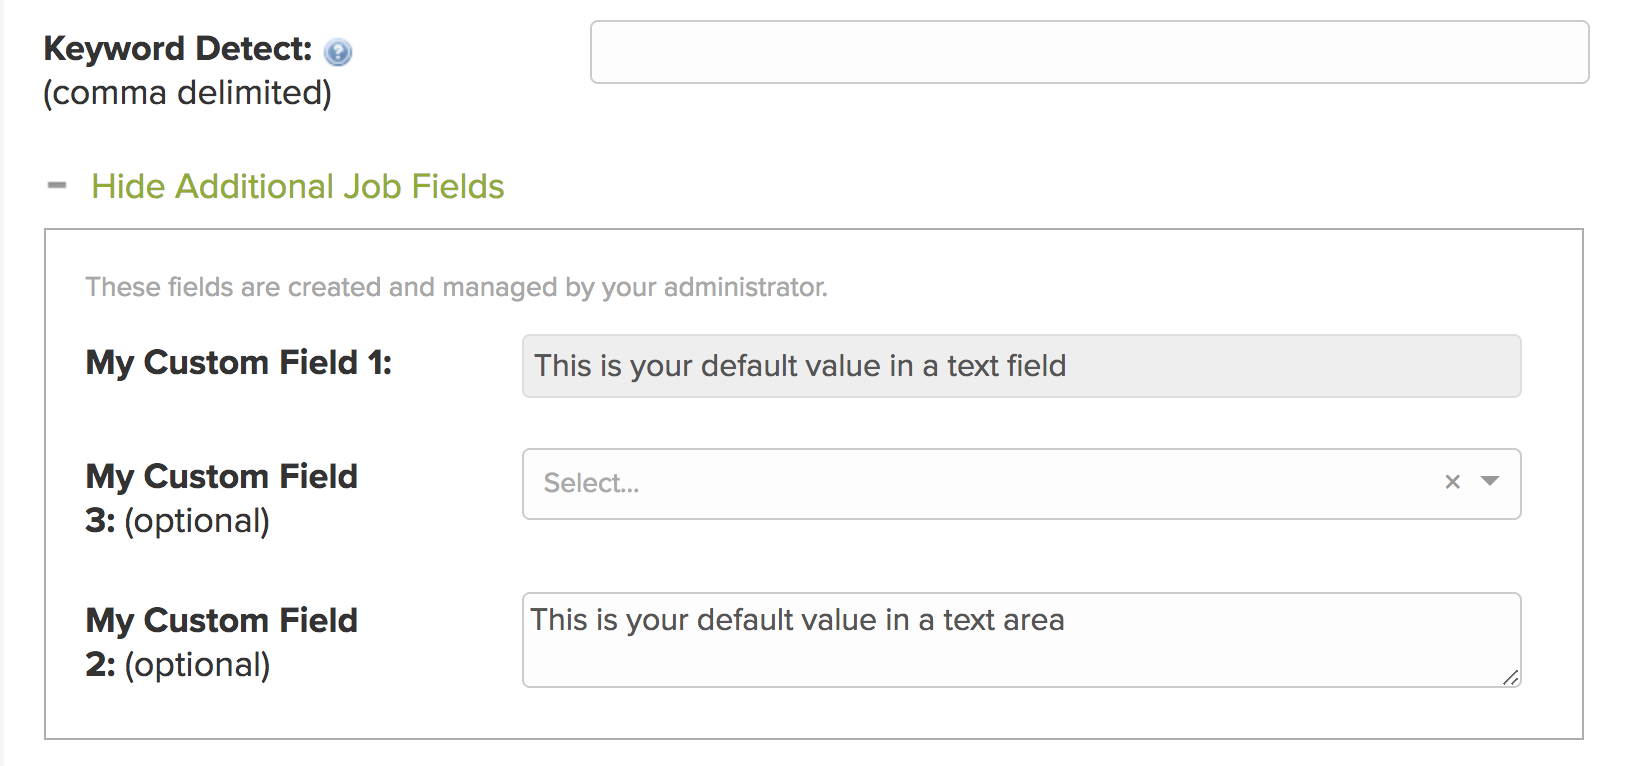
In the above example we created 3 new custom fields cleverly titled “My New Field #” which will be added for all of your job listings. Before using the API let’s take a look at the fields that you will be configuring for creating the field via the ATS Anywhere API:
| Key | Value | Description |
| update_existing_data | boolean | Setting to true will update any previous custom field information |
| custom_fields_schema | ||
| field_name | string | Required field. The name in the system |
| field_type | string, integer, decimal, boolean | Required field. Defaults to “string” if not specified. |
| display_name | string | Required field. The form name that is displayed to the user. |
| default_value | string | Sets the text in the field. |
| required | boolean | Makes the question required when true and optional when false, with accompanying text in the field name. |
| whitelist_values | array of strings | Provides values for select list, and useful for setting up rules for validation. |
| blacklist_values | array of strings | Provides values for select list, and useful for setting up rules for validation. |
| ui_priority | integer | Determines the display order of the custom field in your job listing |
| ui_readonly | boolean | Makes the field unselectable when set to true |
| ui_input_type | text_field, text_area,select | The type of form input that will be used for the field |
| ui_hints | string | Provides the list of available items and order for a select dropdown field |
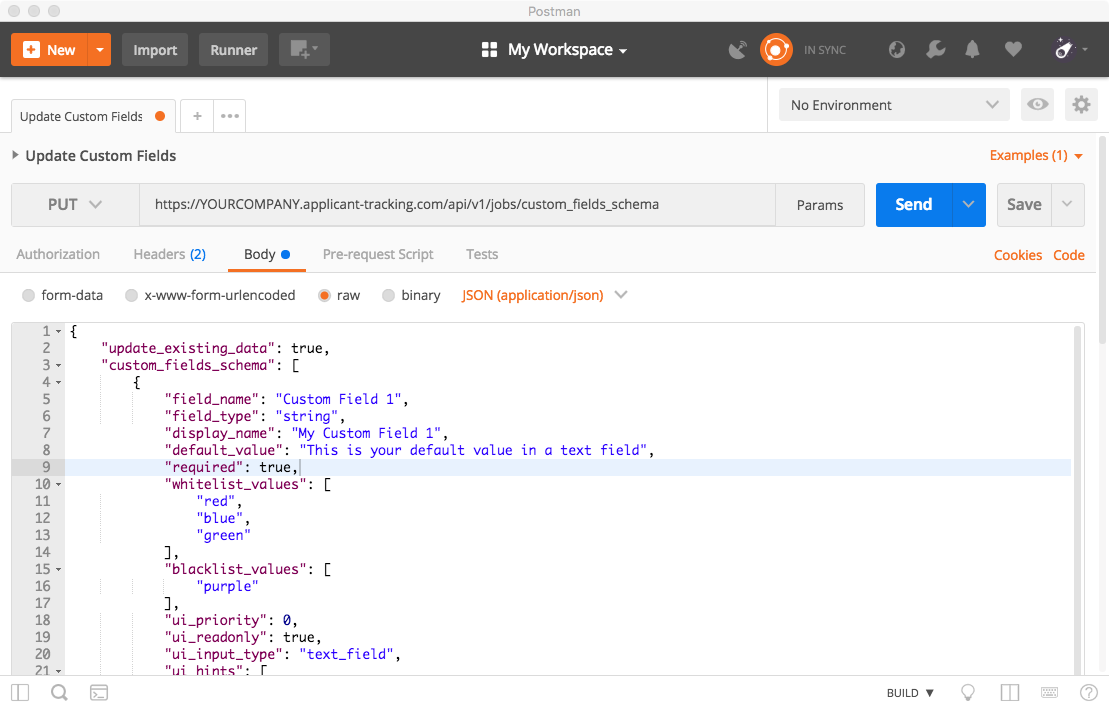
Updating the Fields in Postman
Let’s go back to Postman and recreate the fields in our example above:
- We’ll use the PUT method with the request URL: https://YOURCOMPANY.applicant-tracking.com/api/v1/jobs/custom_fields_schema
- Under Headers area put in the following column values:
- Key: Content-type
- Value: application/json
- Under Body, select the “raw” and see if you can recreate the format as in the example
- Hit “Send”
Here’s how it will look in Postman:
cURL Commands
curl -u YOUR_KEY https://YOURCOMPANY.applicant-tracking.com/api/v1/jobs/custom_fields_schema -H "Content-Type: application/json" \
  -d '{
	"update_existing_data": true,
	"custom_fields_schema": [
		{
		"field_name": "Custom Field 1",
		"field_type": "string",
    		"display_name": "My Custom Field 1",
    		"default_value": "This is your default value in a text field",
    		"required": true,
    		"whitelist_values": [],
    		"blacklist_values": [],
		"ui_priority": 0,
		"ui_readonly": true,
		"ui_input_type": "text_field",
		"ui_hints": []
	    },
		{
		"field_name": "Custom Field 2",
		"field_type": "string",
    		"display_name": "My Custom Field 2",
    		"default_value": "This is your default value in a text area",
    		"required": true,
    		"whitelist_values": [],
    		"blacklist_values": [],
		"ui_priority": 2,
		"ui_readonly": false,
		"ui_input_type": "text_area",
		"ui_hints": []
	    },
	    {
		"field_name": "Custom Field 3",
		"field_type": "string",
    		"display_name": "My Custom Field 3",
    		"default_value": "This is your default value",
    		"required": true,
    		"whitelist_values": [],
    		"blacklist_values": [],
		"ui_priority": 1,
		"ui_readonly": false,
		"ui_input_type": "select",
		"ui_hints": "red"
	    }
    ]
}
And here is the corresponding payload:
{
    "company_id": "15664",
    "custom_fields_schema": [
        {
            "display_name": "My Custom Field 1",
            "field_type": "string",
            "default_value": "This is your default value in a text field",
            "required": true,
            "whitelist_values": [],
            "blacklist_values": [],
            "ui_priority": 0,
            "ui_readonly": true,
            "ui_input_type": "text_field",
            "ui_hints": [],
            "field_name": "Custom Field 1"
        },
        {
            "display_name": "My Custom Field 2",
            "field_type": "string",
            "default_value": "This is your default value in a text area",
            "required": true,
            "whitelist_values": [],
            "blacklist_values": [],
            "ui_priority": 2,
            "ui_readonly": false,
            "ui_input_type": "text_area",
            "ui_hints": [],
            "field_name": "Custom Field 2"
        },
        {
            "display_name": "My Custom Field 3",
            "field_type": "string",
            "default_value": "This is your default value",
            "required": true,
            "whitelist_values": [],
            "blacklist_values": [],
            "ui_priority": 1,
            "ui_readonly": false,
            "ui_input_type": "select",
            "ui_hints": [
                "red"
            ],
            "field_name": "Custom Field 3"
        }
    ],
    "created_at": "2018-03-22T20:33:47-07:00",
    "updated_at": "2018-04-01T18:39:12-07:00"
}
Note that a timestamp will be generated at the end.
And once again here’s how it will appear on your site:
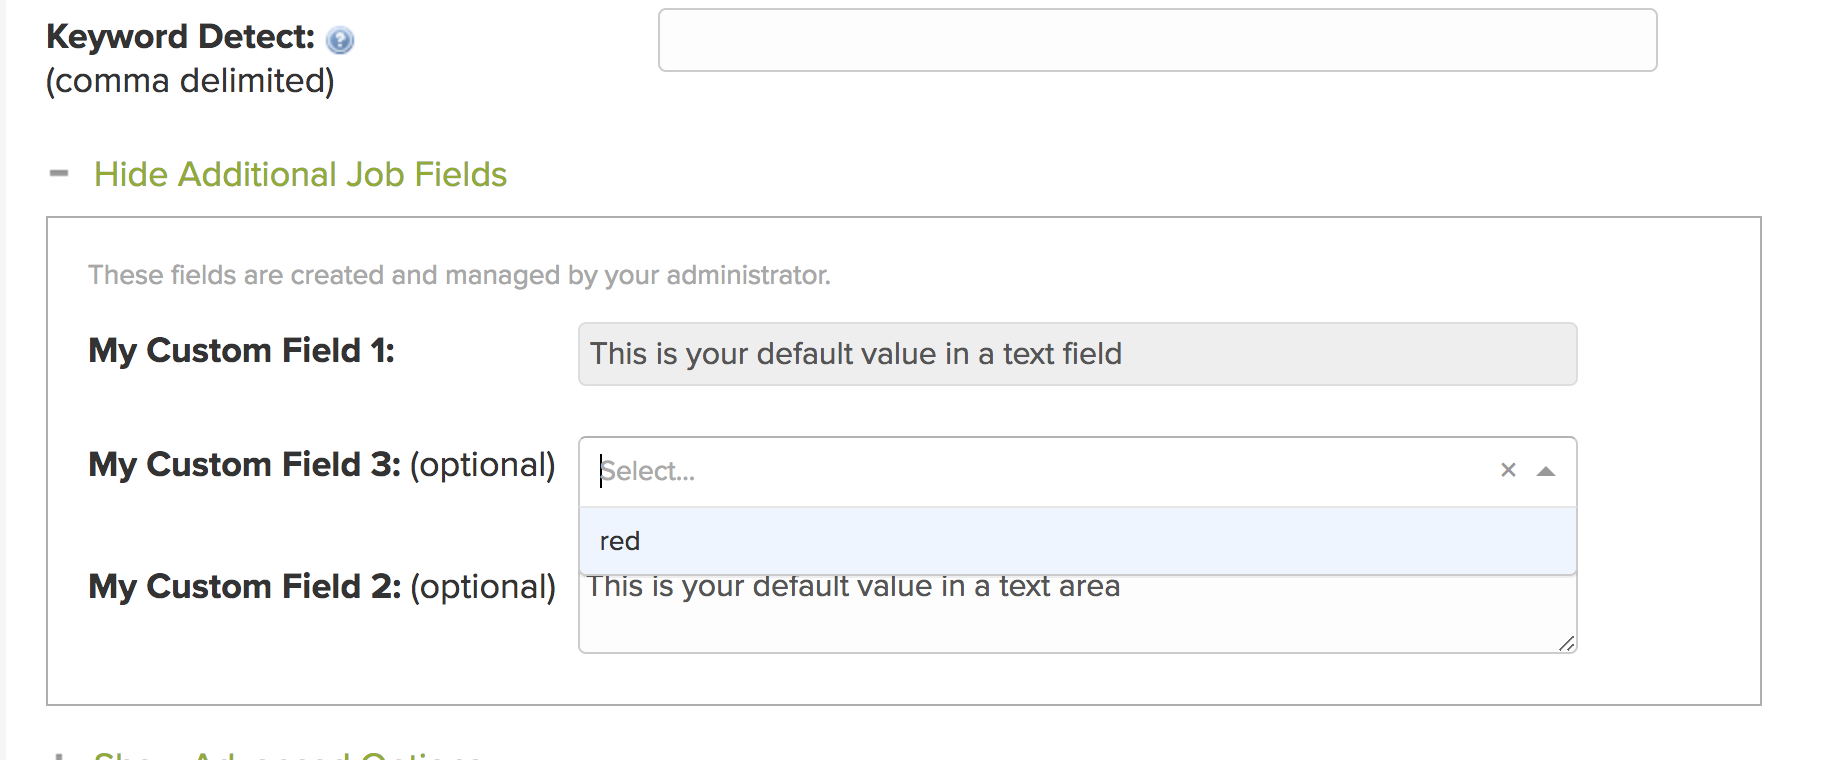
Of course, you will likely have more creative field names than our example above (as well as more than one option in a select list) but this just shows what is possible from the the custom field endpoint.
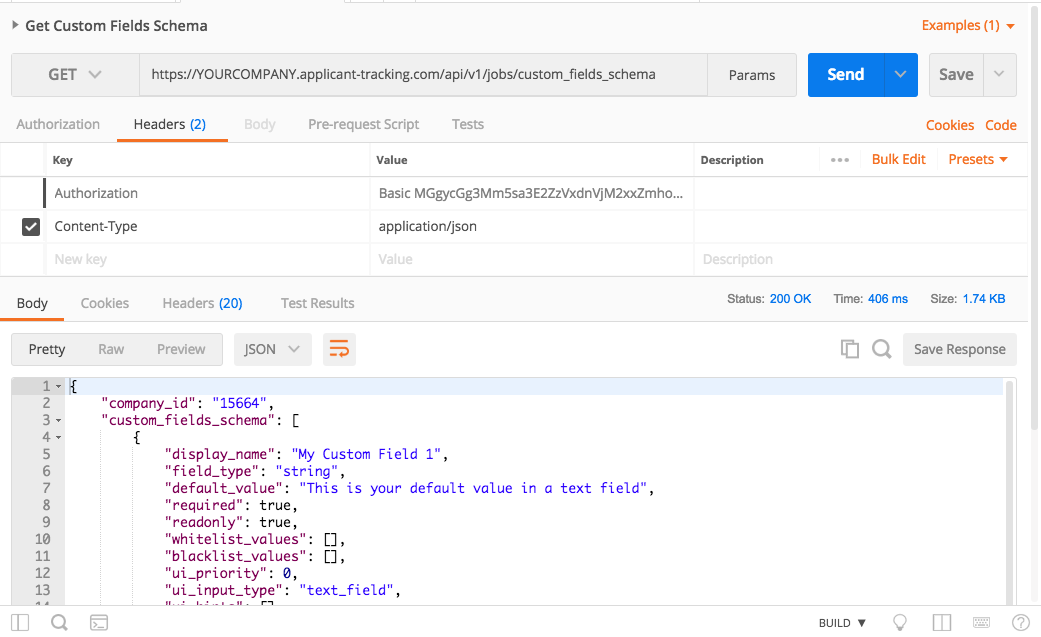
Getting a List of Your Custom Fields
Once you have added a few fields retrieving a list of custom fields is simple.
- Use the GET method with the request URL: https://YOURCOMPANY.applicant-tracking.com/api/v1/jobs/custom_fields_schema
- Under Headers area put in the following column values:
- Key: Content-type
- Value: application/json
- Hit Send, and within the Body frame you will see a full payload of the three jobs in our example: